 USD $ | United States
 GBP £ | United Kingdom
 HKD HK$ | Hong Kong
 CNY ¥ | China
 JPY ¥ | Japan
 EUR € | Euro
 SBD SI$ | Solomon Islands
 PGK K | Papua New Guinea
 THB ฿ | Thailand
 ILS ₪ | Israel
 VND ₫ | Vietnam
 MGA Ar | Madagascar
 XAG | Silver
 IDR Rp | Indonesia
 HTG G | Haiti
 PHP ₱ | Philippines
 MXN $ | Mexico
 WST WS$ | Samoa
 CAD $ | Canada
 LSL L | Lesotho
 BWP P | Botswana
 KRW ₩ | South Korea
 KWD د.ك | Kuwait
 LAK ₭ | Laos
 LKR Rs | Sri Lanka
 TRY ₺ | Turkey
 PKR Rs | Pakistan
 CHF Fr | Switzerland
 PLN zł | Poland
 QAR ر.ق | Qatar
 NAD N$ | Namibia
 MOP MOP$ | Macau
 EGP ج.م | Egypt
 MWK MK | Malawi
 VES Bs.S | Venezuela
 ECS S/ | Ecuador
 OMR ر.ع. | Oman
 XDR | IMF
 LTL Lt | Lithuania
 TJS SM | Tajikistan
 BBD Bds$ | Barbados
 BRL R$ | Brazil
 BZD BZ$ | Belize
 CRC ₡ | Costa Rica
 IRR ﷼ | Iran
 AED د.إ | United Arab Emirates
 PAB B/ | Panama
 VUV VT | Vanuatu
 DOP RD$ | Dominican Republic
 XOF CFA | West Africa
 AWG ƒ | Aruba
 YER ﷼ | Yemen
 XCD EC$ | East Caribbean
 GHS GH₵ | Ghana
 BDT ৳ | Bangladesh
 SRD $ | Suriname
 GMD D | Gambia
 MVR Rf | Maldives
 SVC $ | El Salvador
 BND B$ | Brunei
 GIP £ | Gibraltar
 SHP £ | Saint Helena
 GTQ Q | Guatemala
 AFN ؋ | Afghanistan
 IQD ع.د | Iraq
 AZN ₼ | Azerbaijan
 JOD د.ا | Jordan
 CLP $ | Chile
 BHD .د.ب | Bahrain
 NIO C$ | Nicaragua
 NGN ₦ | Nigeria
 UZS so'm | Uzbekistan
 ERN Nfk | Eritrea
 ANG ƒ | Netherlands
 KYD CI$ | Cayman Islands
 SYP £S | Syria
 SDG ج.س. | Sudan
 LBP ل.ل | Lebanon
 HNL L | Honduras
 DJF Fdj | Djibouti
 TTD TT$ | Trinidad and Tobago
 KHR ៛ | Cambodia
 AOA Kz | Angola
 RWF FRw | Rwanda
 GNF FG | Guinea
 GEL ₾ | Georgia
 FKP £ | Falkland Islands
 BOB Bs. | Bolivia
 CDF FC | Congo
 ETB Br | Ethiopia
 LRD L$ | Liberia
 SOS Sh | Mali
 DZD دج | Algeria
 BIF FBu | Burundi
 SAR ر.س | Saudi Arabia
 UYU $U | Uruguay
 UGX USh | Uganda
 AMD ֏ | Armenia
 MDL L | Moldova
 SGD S$ | Singapore
 LYD ل.د | Libya
 MAD د.م. | Morocco
 ZAR R | South Africa
 TWD NT$ | Taiwan
 HUF Ft | Hungary
 XAF CFA | Central Africa
 SEK kr | Sweden
 RON lei | Romania
 FJD FJ$ | Fiji
 DKK kr | Denmark
 CVE $ | Cape Verde
 RSD din | Serbia
 ISK kr | Iceland
 MZN MT | Mozambique
 ALL L | Albania
 BGN лв | Bulgaria
 BAM KM | Bosnia and Herzegovina
 XPF F | Pacific
 TND د.ت | Tunisia
 JMD J$ | Jamaica
 CNH ¥ | China
 CZK Kč | Czech Republic
 SZL E | Eswatini
 AUD $ | Australia
 NOK kr | Norway
 KES KSh | Kenya
 NZD $ | New Zealand
 MNT ₮ | Mongolia
 RUB ₽ | Russia
 KZT ₸ | Kazakhstan
 XAU | Gold
 KGS с | Kyrgyzstan
 INR ₹ | India
 NPR रू | Nepal
 TOP T$ | Tonga
 ETH Ξ | Ethereum
 SCR ₨ | Seychelles

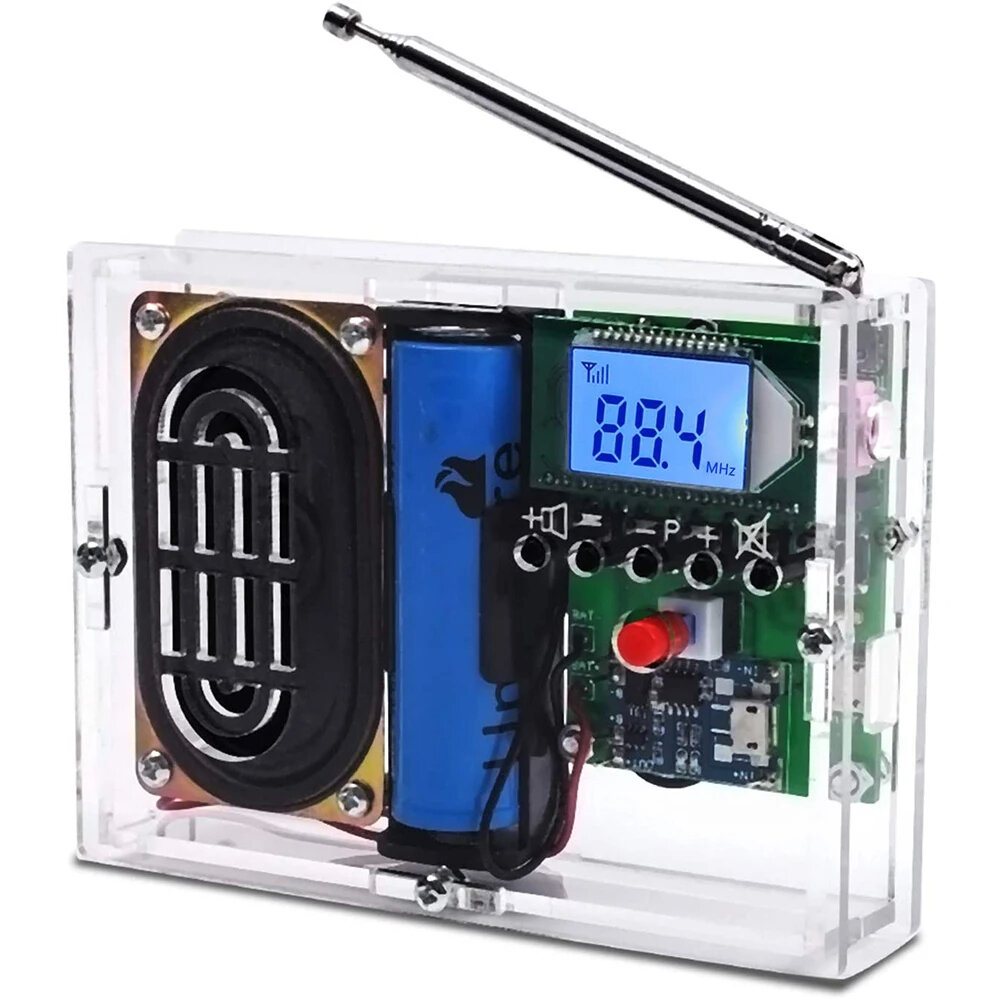
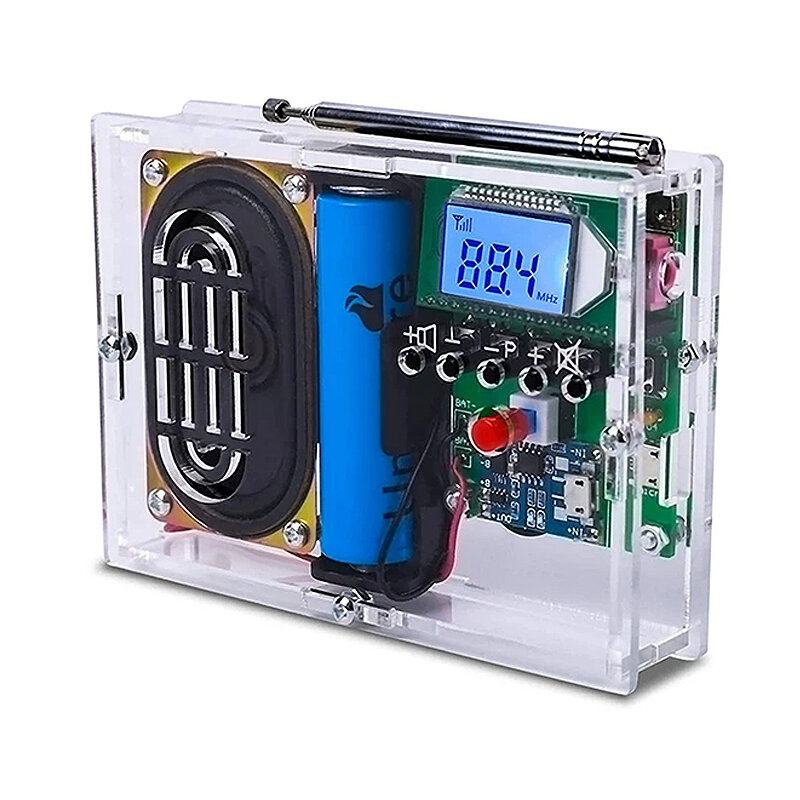
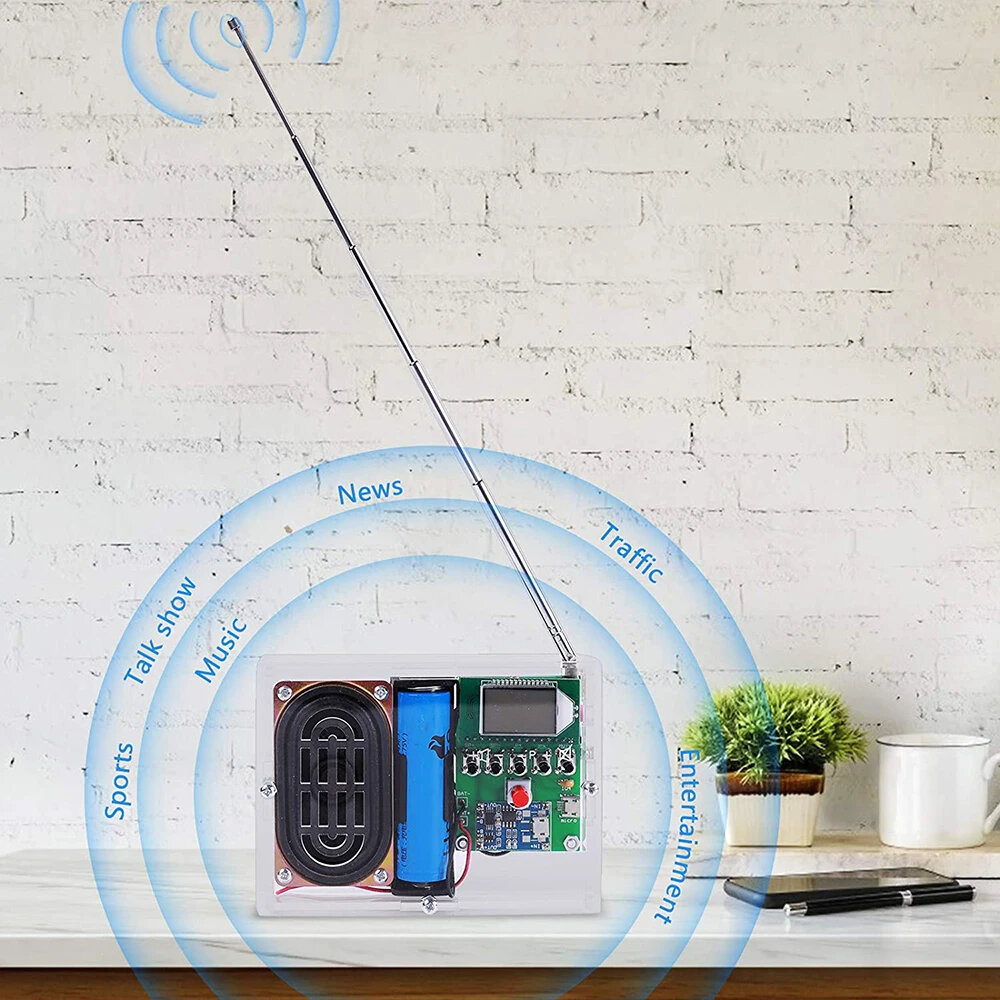
FM Radio Receiver Module DIY Electronic Kit 76-108MHz DIY Radio Speaker Kit Frequency Modification LCD Display Soldering Practice

 Direct purchase from the factory
Gigarantiya nga Luwas nga Pag-checkout

 Libre nga Regalo
 Polisiya sa Pagpadala
 Polisiya sa Pagbalik
Libre nga Regalo
Welcome to Roymall, your professional website for purchasing premium department store gifts. We highly value and appreciate your support, and we want to express our gratitude by adding an extra touch of excitement to your purchases. When you shop with us, you not only get to enjoy high-quality products that enhance your lifestyle, but you'll also receive an exclusive free gift with every order you place. Ready to explore our collection and find your perfect gifts? Browse our selection of premium department store items, place your order, and look forward to the excitement of your free gift arriving alongside your purchase.Polisiya sa Pagpadala
Among paningkamutan nga ihatud ang mga item kanimo human makuha ang imong mga order ug siguruon nga sila makaabot nga luwas. Ang mga detalye sa paghatud ipakita sa imong email sa pagkumpirma.Sa kadaghanan nga mga kaso, ang mga order giproseso sulod sa 2 ka adlaw.Sa espesyal nga mga kahimtang, kini madugay sama sa mosunod: Kung mag-order ka sa Sabado, Domingo o publiko nga mga holiday, kini madugay og 2 ka adlaw..Kasagaran, kinahanglan og 5-7 ka adlaw nga trabaho (Lunes hangtod Biyernes) nga wala maapektuhan sa paglangan sa flight o ubang mga hinungdan sa palibot..Tungod kay among serbisyo sa pagpadala kay sa tibuok kalibutan, ang mga oras sa paghatud magdepende sa imong lokasyon busa kini mahimong magkinahanglan og pipila ka panahon ug palihug hulata nga maligdong kung ikaw anaa sa layo nga mga distrito o mga nasud.1. Polisiya sa Pagbalik & Pagbaylo
Among dawaton lamang ang mga item nga gipalit gikan sa roymall.com. Kung ikaw mopalit gikan sa among lokal nga mga tig-apod-apod o ubang mga tigbaligya, dili nimo kini mabalik sa among bahin. Ang mga item sa katapusang baligya o libre nga mga regalo dili madawat alang sa pagbalik. Aron kwalipikado alang sa pagbalik, ang imong item kinahanglan nga wala magamit ug sa parehas nga kahimtang nga imong nadawat. Kinahanglan usab kini anaa sa orihinal nga packaging.Human makuha ang mga instruksyon sa pagbalik gikan kanamo, palihug ipackage ang imong mga item nga ibalik ug ihulog ang imong package sa lokal nga post office o ubang courier.Among iproseso ang imong pagbalik o pagbaylo sulod sa 3-5 ka adlaw nga trabaho human namo kini madawat. Ang refund iproseso ug kredito awtomatik sa imong orihinal nga pamaagi sa pagbayad.Walay mga pagbalik o pagbaylo ang madawat kung ang produkto gipahiangay, lakip na ang custom size, custom kolor, o custom printed.Kinahanglan og dugang nga tabang, palihug kontaka kami. service@roymall.com or Whatsapp: +8619359849471
2.Polisiya sa Refund
Makuha nimo ang bug-os nga refund o 100% store credit human namo madawat ang gibalik nga package ug susihon kini. Ang refund iproseso ug kredito awtomatik sa imong orihinal nga pamaagi sa pagbayad. Palihug hinumdomi nga ang mga gasto sa pagpadala ug bisan unsang mga buhis o bayad dili mabalik. Ang dugang nga mga gasto sa pagpadala dili mabalik kung ang package naipadala na. Ikaw ang responsable sa pagbayad niini nga mga bayad ug dili namo kini mabalik, bisan kung ang order ibalik kanamo.Human namo madawat ug makumpirma ang imong gibalik nga item, ipadala namo kanimo ang email aron pahibal-on nga among nadawat ang imong gibalik nga item. Pahibal-on usab namo kanimo ang pag-aprobar o pagsalikway sa imong refund.Kung aduna kay mga problema bahin sa proseso sa refund, palihug kontaka kami. service@roymall.com or Whatsapp: +8619359849471Introduction:
It is an 76.0MHz-108.0MHz Wireless FM Radio Receiver DIY Kit. It has a built-in high-definition display LCD display screen which can clearly display the receiving frequency and it can store 22 radio stations, which is enough to meet your needs.
Feature:
>>>Manual: Click here to open<<<
1. LCD Display FM Radio Receiver DIY Kit
2. Work Voltage: DC 3.0V~5.0V
3. Output impedance: 8ohm
4. Output power: 5W
5. Output channel: Mono for speaker and Dual channel for earphone
5. Frequency: 87.0MHz~108.0MHz (Disable CampussBroadcasting Band)
6. Frequency:76.0MHz~108.0MHz (Enable CampussBroadcasting Band)
7. Equivalent noise: >=30dB
8. Automatically search for radio stations
9. Built-in 30-level digital volume adjustment
10. Automatic memory function after power off
11. Built-in rechargeable module
12. Power saving mode with backlight off for 20 seconds
13. Support speaker and earphone audio output
Use Methods:
1. Keep press AUTO button to automatically search and store the radio stations that can be listened to.
2. Automatically name searchable stations like P01,P02,P02 and so on.
3. Press P+ and P- to switch saved stations.
4. Press V+ and V- to adjust volume from V00 to V30.
5. Switch CampusBroadcasting Band: Keep press V+ and V- before power ON and then turn ON work power switch. It means enable CampusBroadcasting Band if display C1 on LCD. It means disable CampusBroadcasting Band if display C0 on LCD.Available after restart.
6. Enable backlight mode: Keep press P+ and P- before power ON and then turn ON work power switch. It means keep backlight ON if display B1 on LCD. It means the backlight will turn OFF after 20second if display B0 on LCD(This is the power saving mode).Available after restart.
7. It can output audio from speaker and earphone jack. The speaker of the module does not work when the earphone is connected.
Note:
1. It cannot receive radio while it is charging.
2. It is a wireless module. So do not use it in an environment with siggnal interference.
3. Input charging voltage form micro USB on the bigger PCB.
Installation Tips:
1. User needs to prepare the welding tool at first.
2. Please be patient until the installation is complete.
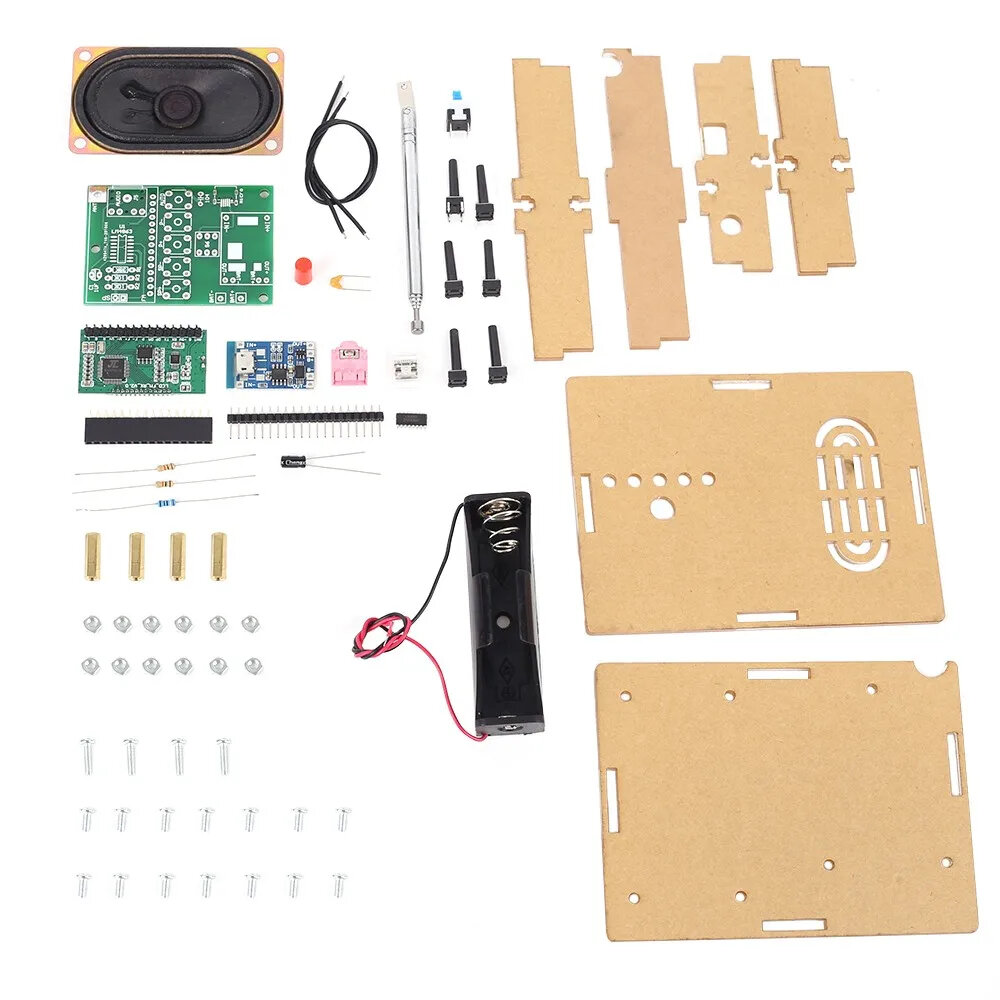
3. The package is DIY kit. It need finish install by user.
4. The soldering iron can"t touch the components for a long time(1.0 second), otherwise it will damage the components.
5. Pay attention to the positive and negative of the components.
6. Strictly prohibit short circuit.
7. User must install the LED according to the specified rules. Otherwise some LED will not light.
8. Install complex components preferentially.
9. Make sure all components are in right direction and right place.
10. It is strongly recommended to read the installation manual before starting installation!!!
11. Please wear anti-static gloves or anti-static wristbands when installing electronic components.
Installation Steps (Please be patient install!!!):
Step 1: Install 1pc 39Kohm Metal Film Resistor at R1.
Step 2: Install 2pcs 10Kohm Metal Film Resistor at R2,R3.
Step 3: Install 1pc SOP-16 IC LM4863 at U1.There is a mark on one end of the IC and there is a mark on PCB where the IC can place on.These two marks are corresponding to each other and are used to specify the installation direction of the IC Socket.
Step 4: Install 1pc micro USB socket at J2.
Step 5: Prepare 6pcs pin header.
Step 6: Install 1pc Charging Module at J7 and fix by 6pcs pin header.
Step 7: Remove black fixed block from 6pcs pin header and fix Charging Module.
Step 8: Install 1pc 0.1uF Monolithic Capacitor at C2.
Step 9: Install 1pc 1uF 50V Electrolytic Capacitor at C1.Pay attention to distinguish between positive and negative.The Longer pin is positive pole.
Step 10: Install 1pc 3.5mm Audio Socket at J5.
Step 11: Cut a pin from 16Pin Female Socket.
Step 12: Install Female Socket at FM.Pay attention to the direction of the cut pin.
Step 13: Install 1pc Self-locking Button at S6.
Step 14: Install 5pcs 6*6*20mm Black Button at S1-S5.
Step 15: Install 1pc Self-locking Button Cap on Self-locking Button.
Step 16: Install 1pc Antenna at ANT.Note that the antenna should be installed on the front of the PCB.
Step 17: Install 1pc 18650 Battery Box at J1,J3.Pay attention to the positive and negative.Red wire is positive pole.
Step 18: Install 2pcs 15cm black Cable on speaker.
Step 19: Connect speaker to PCB at SP. The speaker does not distinguish between positive and negative.
Step 20: Install 1pc FM Audio Receiver on Female pins.Pay attention to the direction of the cut pin.
Step 21: Tear off the protective film on the surface of the acrylic shell.
Step 22: Install 4pcs M3*15mm Copper Pillar and 4pcs M3*10mm Screw on Acrylic bottom plate.
Step 23: Fixed speaker on acrylic bottom plate by 4pcs M3*6mm Screw.
Step 24: Install 3pcs M3*6mm Screw and 3pcs M3 Nut on Acrylic bottom plate.Note that the wire should not be placed between the PCB and the acrylic.
Step 25: Fixed main PCB on acrylic bottom plate by 3pcs M3 Nut.Note that the wire should not be placed between the PCB and the acrylic.
Step 26: Adjust the position of the battery box. Do not place the wires under the battery box. The wires can be moved to both ends of the battery box.
Step 27: Fix other acrylic plate by 6pcs M3*6mm Screw and 6pcs M3 Nut.
Step 28: Connect to power supply and enjoy the effect.
| No. | Component Name | PCB Marker | Parameter | Quantity |
| 1 | LM4863 | R7 | SOP-14 | 1 |
| 2 | 3.5mm Audio Socket | R1,R2.R4,R5,R8~R14 | 5Pin | 1 |
| 3 | Monolithic Capacitor | R3 | 0.1UF 104 | 1 |
| 4 | Electrolytic Capacitor | Y1 | 1uF 50V | 1 |
| 5 | Metal Film Resistor | C1,C2 | 10K ohm | 2 |
| 6 | Metal Film Resistor | TEA5767 | 39K ohm | 1 |
| 7 | FM Audio Receiver | LM386 | 41*22mm | 1 |
| 8 | Black Button | U1 | 6*6*20mm | 5 |
| 9 | Micro USB Socket | R6 | SMD | 1 |
| 10 | Antenna | C4,C5,C6 | 80mm-255mm | 1 |
| 11 | Female Pin | C3,C9,C11 | 16Pin | 1 |
| 12 | Self-locking Button | C7,C8 | 8*8mm | 1 |
| 13 | Self-locking Button Cap | Q1-Q4 | Red | 1 |
| 14 | 18650 Battery Box | 5V | 1 | |
| 15 | Male Pin | D13 | 7Pin | 1 |
| 16 | Charging Module | 056SMC_4 | 26*18mm | 1 |
| 17 | Cable | S4 | 15cm | 2 |
| 18 | Speaker | S4 | 8ohm 5W | 1 |
| 19 | Acrylic Shell | S1,S2 | 6 | |
| 20 | Copper Pillar | LM386 | M3*15mm | 4 |
| 21 | Screw | U1 | M3*10mm | 4 |
| 22 | Screw | X1 | M3*6mm | 14 |
| 23 | Nut | M3 | 12 | |
| 24 | PCB | SP | 1 |
Package Include:
1x LM4863
1x 3.5mm Audio Socket
1x Monolithic Capacitor
1x Electrolytic Capacitor
2x Metal Film Resistor(10Ku03a9)
1x Metal Fim Resistor(39Ku03a9)
1x FM Audio Receiver
5x Black Buttons
1x Micro USB Socket
1x Antenna
1x Female Pin
1x Self-locking Button
1x Self-locking Button Cap
1x 18650 Battery Box
1x Male Pin
1x Charging Module
2x Cables
1x Speaker
6x Acrylic Shells
4x Copper Pillars
4x Screws(M3*10mm)
14x Screws(M3*6mm)
12x Nuts
1x PCB